
Deck boards should usually cross the supporting joists, commonly at a right angle, so every board is fastened at regular framing intervals. That structural relationship comes before the visual choice of running boards toward the yard or across the back of the house. A parallel-to-joist board, picture-frame border, breaker board, or diagonal pattern needs framing and blocking positioned for that layout. Diagonal decking can also require closer joist spacing under the decking manufacturer's current instructions. For a new deck, choose the surface pattern before finalizing the frame. For resurfacing, document the existing joist direction and spacing before selecting a new pattern.
Let the frame decide what layouts are possible
The visible boards are only the top layer of the deck. Below them, joists create the repeated fastening lines that support each board. A standard field board normally crosses those joists, which gives it support and a fastening point at each intersection. If a board runs in the same direction as the joists, it cannot simply float between them; the frame needs additional joists or blocking positioned beneath that board.
This is why board direction should be chosen before the deck frame is complete. The layout affects joist orientation, spacing, border support, seam locations, stair framing, railing posts, and the quantity of full-length boards. Changing direction after framing may add substantial blocking or create short unsupported ends that were not part of the original plan.
Current manufacturer instructions control the final details. Trex's joist-spacing guidance describes 16-inch-on-center spacing as a common maximum for standard composite applications and calls for 12-inch spacing when its decking is installed diagonally. That is useful planning guidance, not a universal number for every product. Board profile, product line, installation angle, stair use, load, and local requirements can change the allowed span, so use the current guide for the exact material being installed.
- Map the joists, beams, posts, ledgers, and rim boards before drawing the surface pattern.
- Give every field-board end, border, and seam continuous support where the product requires it.
- Keep fasteners centered in suitable framing rather than driving them at improvised angles.
- Coordinate the deck plan with current manufacturer and address-specific requirements.
Should boards run toward the yard or across the house?
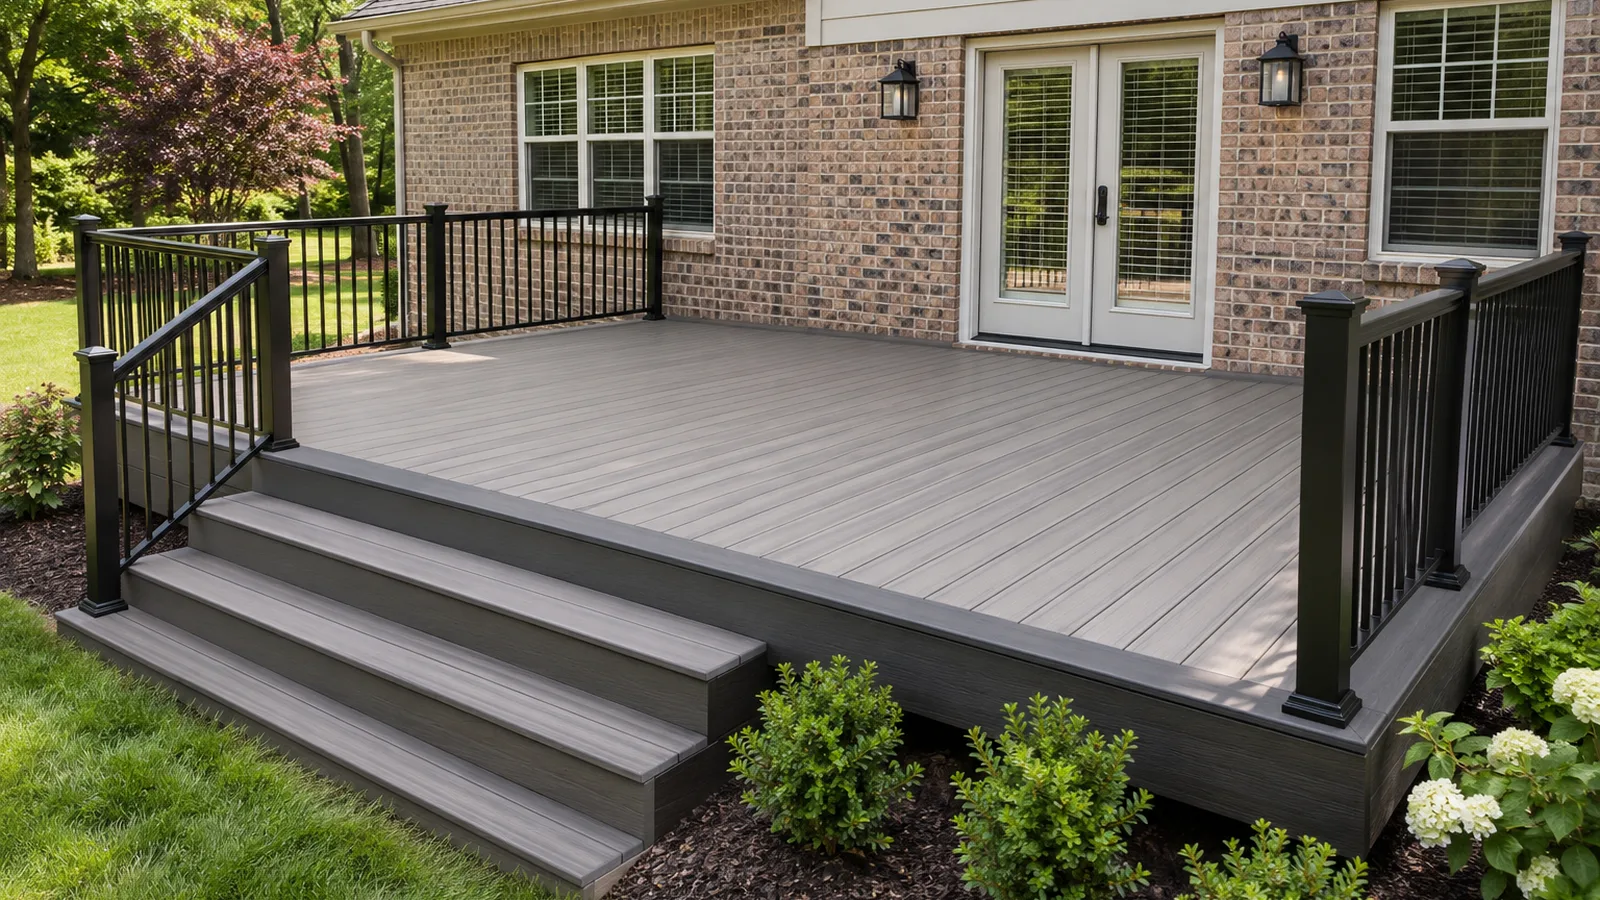
When both layouts can be framed correctly, the house and yard can guide the visual choice. Boards that run away from the house tend to lead the eye toward the lawn, pool, garden, or view. This can make the path from the back door to the yard feel direct. It also works naturally when the joists run parallel to the house wall, which is a common but not universal deck-frame arrangement.
Boards that run across the back of the house can emphasize width and create a calmer horizontal line beneath a long wall or row of doors. That direction may suit a shallow, wide deck. It is not automatically the simpler choice, however. If the existing joists run parallel to those boards, the layout needs a different joist plan or sufficient perpendicular support below the surface.
Use the main viewing points to compare the options. Look from the kitchen or living room, from the primary exterior door, from the yard, and from the top of the stairs. A board direction that looks attractive from one corner may lead awkwardly into a stair, create many short pieces around a bay window, or place a prominent seam in front of the door. The strongest layout supports both the structure and the way people move through the space.
- Use boards running toward the yard to reinforce a house-to-landscape sightline.
- Use side-to-side boards when width is the main visual goal and the frame supports that direction.
- Keep the first full board or border straight relative to the intended visual reference.
- Check door thresholds, wall irregularities, stairs, and rail posts before locking the starting line.
What changes with diagonal or patterned decking?
Diagonal boards can make a simple rectangular deck feel more dynamic and may reduce the effect of a house wall that is visibly out of square. They also create a longer unsupported path across the framing than boards installed at a right angle. That is why a manufacturer may require closer joist spacing for diagonal installation. Do not rotate a straight layout 45 degrees without checking the exact product span and fastening instructions.
More complex patterns multiply the planning points. A herringbone, chevron, or multi-direction layout needs support below every change in direction and every board end. The centerline must be established accurately, and the frame may need doubled joists, flat blocking, or dedicated support members. These patterns also increase cuts, offcuts, seams, and the chance that a small layout error becomes obvious across the finished surface.
A restrained layout often ages better visually. A single diagonal field inside a straight picture-frame border can provide movement without making every edge complicated. On a deck with several doors, stairs, corners, or built-in features, straight field boards and one well-planned breaker board may look more intentional than a pattern competing with the architecture.
- Confirm the product's allowed joist spacing at the actual installation angle.
- Draw every change in board direction and place framing beneath it.
- Plan the pattern from a fixed centerline or primary edge rather than an irregular house wall.
- Include additional cutting and material yield in the project plan without assuming a universal waste percentage.
Coordinate borders, breaker boards, seams, and stairs
A picture-frame border runs around the deck perimeter and hides exposed field-board ends. Because part of that border often runs in the same direction as the field joists, it needs dedicated support below it. TimberTech's current picture-frame guidance specifically calls for additional blocking or joists when a deck board runs in the same direction as the joists, and for full support beneath the ends of infill boards that meet the border.
A breaker board is a board installed across the field, often near the center of a long deck. It can divide long runs into manageable lengths and create an intentional place for board ends. It also needs framing on both sides so the adjoining ends and the breaker board itself can be fastened correctly. A breaker board should be part of the frame layout, not a decorative strip inserted after the joists are complete.
Stairs deserve their own surface plan. The field-board direction does not have to force awkward tread cuts or tiny pieces at the landing. Draw how the border meets the top step, where railing posts interrupt the surface, and how water and debris can leave the gaps. The cleanest result often comes from aligning the landing, stair opening, and border before deciding the exact field-board count.
- Support picture-frame boards and every field-board end independently.
- Use a breaker board to organize long runs only when the framing is designed for it.
- Avoid narrow ripped pieces at the house or perimeter by calculating the first and last rows together.
- Resolve stair treads, landings, rail posts, fascia, and border overhang as one edge detail.
Can board direction change when resurfacing a deck?
Sometimes, but resurfacing is not a surface-only decision. After the old boards are removed, verify the joist direction, spacing, size, condition, level, connections, and support at every planned board end. A new composite product may have different span, gapping, and fastening requirements from the removed wood or composite boards.
Keeping the existing direction is usually the most direct option when the frame is sound and compatible with the new material. Changing from straight to diagonal may require closer joist spacing. Changing to boards that run parallel with the joists can require extensive new framing. Adding a picture frame or breaker board also needs support that may not exist in an older rectangular frame.
Use the open-frame stage to solve low or high joists, damaged framing, poorly placed seams, water traps, and missing support. Do not cover a structural or drainage problem simply because the old board direction can be repeated. The new layout should follow the verified frame and product instructions, not the appearance of the deck before demolition.
A Greater Charlotte deck-board layout checklist
Start with a scaled plan showing the house wall, doors, windows, deck outline, stairs, rail posts, grill or kitchen zone, and the main route to the yard. Add the joists and beams, then draw at least two surface layouts. Mark every border, seam, breaker board, diagonal change, and cut around a post. This reveals whether an attractive sketch is also buildable.
For a new deck, settle the surface direction before finalizing joist and blocking locations. For an existing deck, uncover and document the frame before ordering all the decking. In either case, review the current installation guide for the selected board and fastening system, then confirm project-specific structural, permit, HOA, and inspection requirements for the address.
Unique Patio Concepts can help Greater Charlotte homeowners plan the deck surface and substructure together. The right answer may be simple boards leading toward the yard, a side-to-side field that emphasizes width, a diagonal accent, or straight field boards framed by a contrasting border. The goal is a layout that looks deliberate because every visible line has support beneath it.
- Which direction do the joists run, and what spacing does the selected decking allow?
- What should the boards emphasize from the house, yard, and stair approach?
- Where will full board ends, seams, borders, and breaker boards land?
- What extra framing is needed below boards that run with the joists?
- How will the first and last board widths avoid awkward slivers?
- Are stairs, rails, doors, drainage gaps, and future built-ins coordinated with the pattern?
Plan the deck pattern and frame together
Request a Greater Charlotte deck consultation with Unique Patio Concepts to compare board direction, borders, stairs, railings, and substructure before materials are ordered.
Request a free estimateFrequently asked questions
Do deck boards have to run perpendicular to the house?
No. Deck boards do not follow a universal house-facing direction. They normally need to cross and fasten to the supporting joists, so the frame determines which visual directions are simple and which require additional support.
Can deck boards run parallel with the joists?
Only when additional joists or blocking provide proper support and fastening below those boards. A board should not span unsupported in the same direction as the framing. Follow the current installation details for the selected decking.
Do diagonal deck boards need closer joist spacing?
Often, yes. Trex currently calls for 12-inch-on-center joist spacing for its diagonally installed composite decking compared with a common 16-inch maximum for standard applications. Requirements vary by product, so verify the exact manufacturer's guide.
Which direction makes a deck look bigger?
Boards running toward the yard can make the deck feel deeper, while boards running across the house can emphasize width. The effect depends on the deck shape, doors, stairs, border, and main viewing angle, and the framing still has to support the chosen direction.
Can you change deck-board direction during resurfacing?
Sometimes. Remove the old surface and verify the frame first. A new direction may require closer joist spacing, added blocking, doubled support at seams, or a different border detail, and the new decking may have different installation requirements.
Does a picture-frame border affect deck framing?
Yes. Border boards and the ends of the field boards need continuous support and correct fastening. Additional joists or blocking are commonly required where border boards run with the main joists.